Ages later…the siding!!

Hi all!
It’s been ages since I posted on the tiny house. I have no idea how people are able to do this by themselves in just a few months. Perhaps they don’t have any other commitments? Or…a large building crew? Anyway. Progress HAS BEEN MADE!
I finished my MA work in May, and since then I’ve been working like a crazed person on the tiny house. It has been tagged and titled, and since I’m moving back to Missouri (about a 14 hour drive) I decided to be cautious and hire someone (with many certifications and a TON of liability insurance) to tow my house for me. Plus, a Honda Element can barely tow a mini-cooler, let alone a tiny (giant) house.
So, first…pictures! Since finishing the roof, I can say that, if you choose a roof style, try your best to avoid the decorative sloping front roof used by Tumbleweed. We all know I don’t love Tumbleweed (largely due to cost and massive errors in the expensive plans), but this design added 2 months and much cursing to the job. In addition, it took away precious space. But once you cut the ridge beam to move from regular gabled to “decorative”…you have committed.
So, roof is done. Now, for the siding. I went with some relatively pricey cedar, and I’ll tell you why. Not only is it gorgeous and aromatic, BUT, the initial cost up front actually ends up paying for itself. You don’t have to seal cedar. It is naturally mold, water, and bug resistant. It ages beautifully. Any other siding would need to be primed or sealed, so what you save up front really isn’t worth it in the end. (NB: if you do use cedar trim from a big-box store, you’ll need to seal that…it’s not from the same part of the tree, and therefore is not as awesome as the cedar siding!)
 <– OOoooooh, AHHHhhhhh!
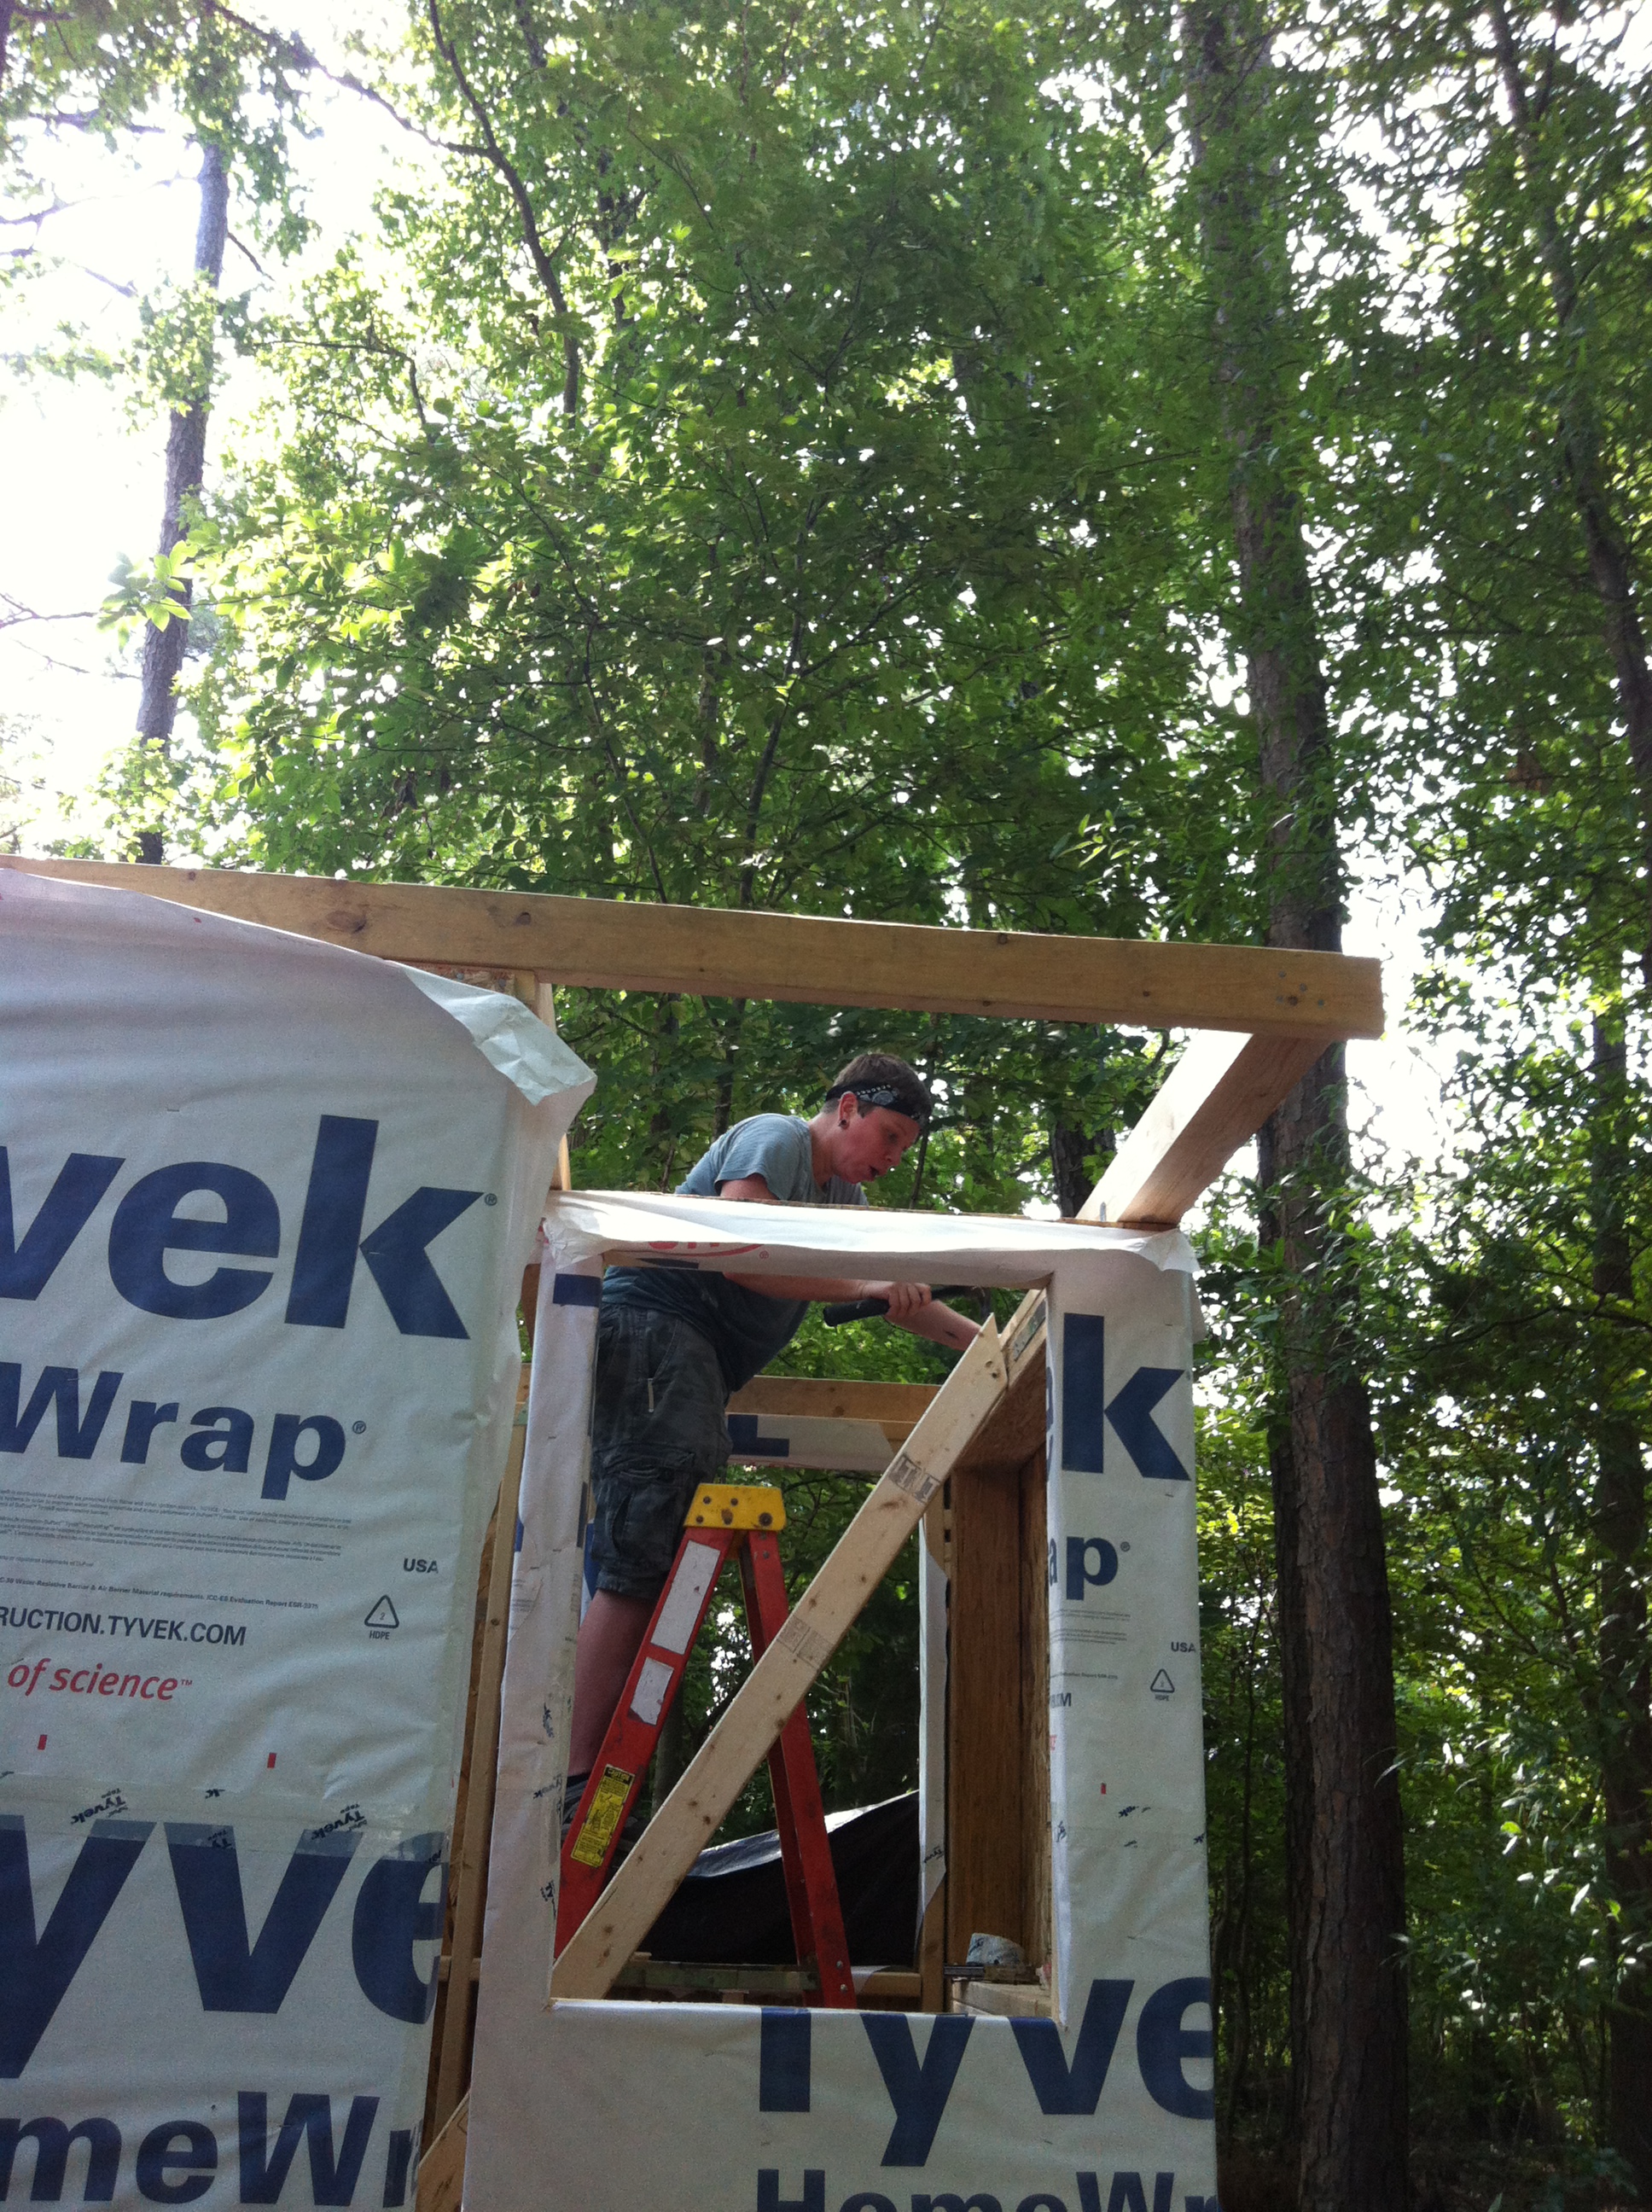
So, before putting up the siding, I put trim on the edges of the house and around the windows. Be sure not to forget (as I did) to also place 1/4 inch treated furring strips under the trim as well as along the house (against the studs!). If you forget to do this, you’ll have to curse and go back to do it all over again so that your siding and trim don’t look ridiculous. The furring strips add a necessary gap for water drainage between the tyvek and the siding. Don’t skip this part! 😀
The most difficult part of this was cutting out the area for around the wheel wells. I used a large piece of craft poster paper, cut it out, and laid the siding on the template. Each piece of siding overlaps the next by 1 inch…just in case.
Also, most tell you to use nails on this part. Um…nope. Let’s split some really expensive cedar with nails! Also, look at all those silvery heads shining! Doesn’t it look….hideous? Yes. Hideous. I used camo deck screws, available at Home Depot. They have a very small head, didn’t split the cedar (unless you got crazy with the tightening, which I sometimes did at first), and are also a perfect brown color…camo, man. Get the camo.
 Moving along…
 Ooh, oooooh, it’s happening!
 …..
…..
 BOOM. Beauty!!!
So, the siding is done! WHOO! Now on to the annoying details. Unless you’re a woodworking mastermind, you’ll end up with small gaps between the siding and the trim. I went back through (especially on the tongue side of the trailer, which withstands the most weather when on the road) and put pieces of those aforementioned treated furring strips in those gaps, regardless of how small. This eliminates the ability for water to get in (almost 100%). Though silicone might have provided a bit better seal, it would also be messier, more expensive, and definitely more noticeable.
So, now that you’re kind of caught up, I’ll catch you up more in the next few days! I’m almost to the insulation phase…so excited!
Thanks everyone! And as usual…if you have any questions, please feel free to contact me!
Yes, it’s been forever. Because I’ve been building, that’s why!

Hey, tiny house fans!
Ok. So, last semester didn’t leave me much time to make significant progress on my wonderful tiny dwelling. However, I made it through, and I’ve been very, very busy! The metal roofing is going on, the front pitch is finished (it was torture. please see previous posts for my thoughts on this particular design) and the windows are going in! The rain slowed me today, so I decided to take this opportunity to let you know what’s been going on 😀 First, here’s a picture:
 <– A view from the back. Trim work has begun, and 3 of the windows are in!
Ok. So, I won’t go into detail on the process behind all I’ve done. But the metal roofing has started going up – I went with Union Corrugating’s master rib roofing, as it seems to be the tiny house builder’s tried and proven material. Also, it is VERY affordable. My entire roof, along with edging, sealing strips, and specialized screws was about 500$. Not too shabby! On that note…words of advice: WEAR GLOVES. The edges of this stuff are razor sharp. They don’t seem it, but trust that they can rip through pants with no effort. Yes. I ripped my pants. And my hand. But I’m ok.
 <– Dormer roofing, sans ridge cap.
So, there are some specific steps to follow in closing in the shell of a tiny house. 1) trim, 2) metal roofing, 3) windows (this could happen earlier, but I didn’t want to drop things and break any of those windows. They weren’t cheap! 4) window/edge trim, 5) furring strips (air gap for siding), and 6) siding. Right now I’m doing as much as I can to get as many of these steps finished as soon as possible. I’m aiming to put the siding up 2 weeks from now, at which point I will happily rid myself of the horrible tarp.
I went with cedar for both the trim and the siding. Yes, cedar is a bit more expensive than buying regular wood and sealing it. However, check out the sealant prices, and colors. It’s expensive, messy, and rarely gives you a color that looks anything like what you’d want on the outside of a beautiful little structure you’ve been working your butt off to complete. A few words on cedar: you don’t have to seal it. You actually SHOULDN’T seal it, as that ruins the properties that make it the best choice. It is a natural bug and mold repellant, it looks beautiful, it is insanely light & easy to work with, and…well, it smells pretty nice, even though any trim you get will not likely be the “aromatic” type. Well worth the extra $ to forgo chemical sealants/weird colors/extra weight. Cedar does give you the nastiest splinters of all woods, though…so, as with the metal, wear gloves or prepare to do a lot of home surgery on tiny little splinters.
The windows weren’t as horrible as I thought they’d be. Just be sure to put the flashing on from the bottom up to prevent any leakage, and double check that the sills are level and square. Then put a few shims on the bottom sill, run a bead of silicone around the outside of the flashing (leaving two 2 inch gaps on either side of the bottom for moisture release), pop that window in, and screw it in place. The window manufacturer recommended nailing it in, but no. I don’t trust myself with a hammer that close to a window.
This, my friends, is my lovely loft with all of the windows in:
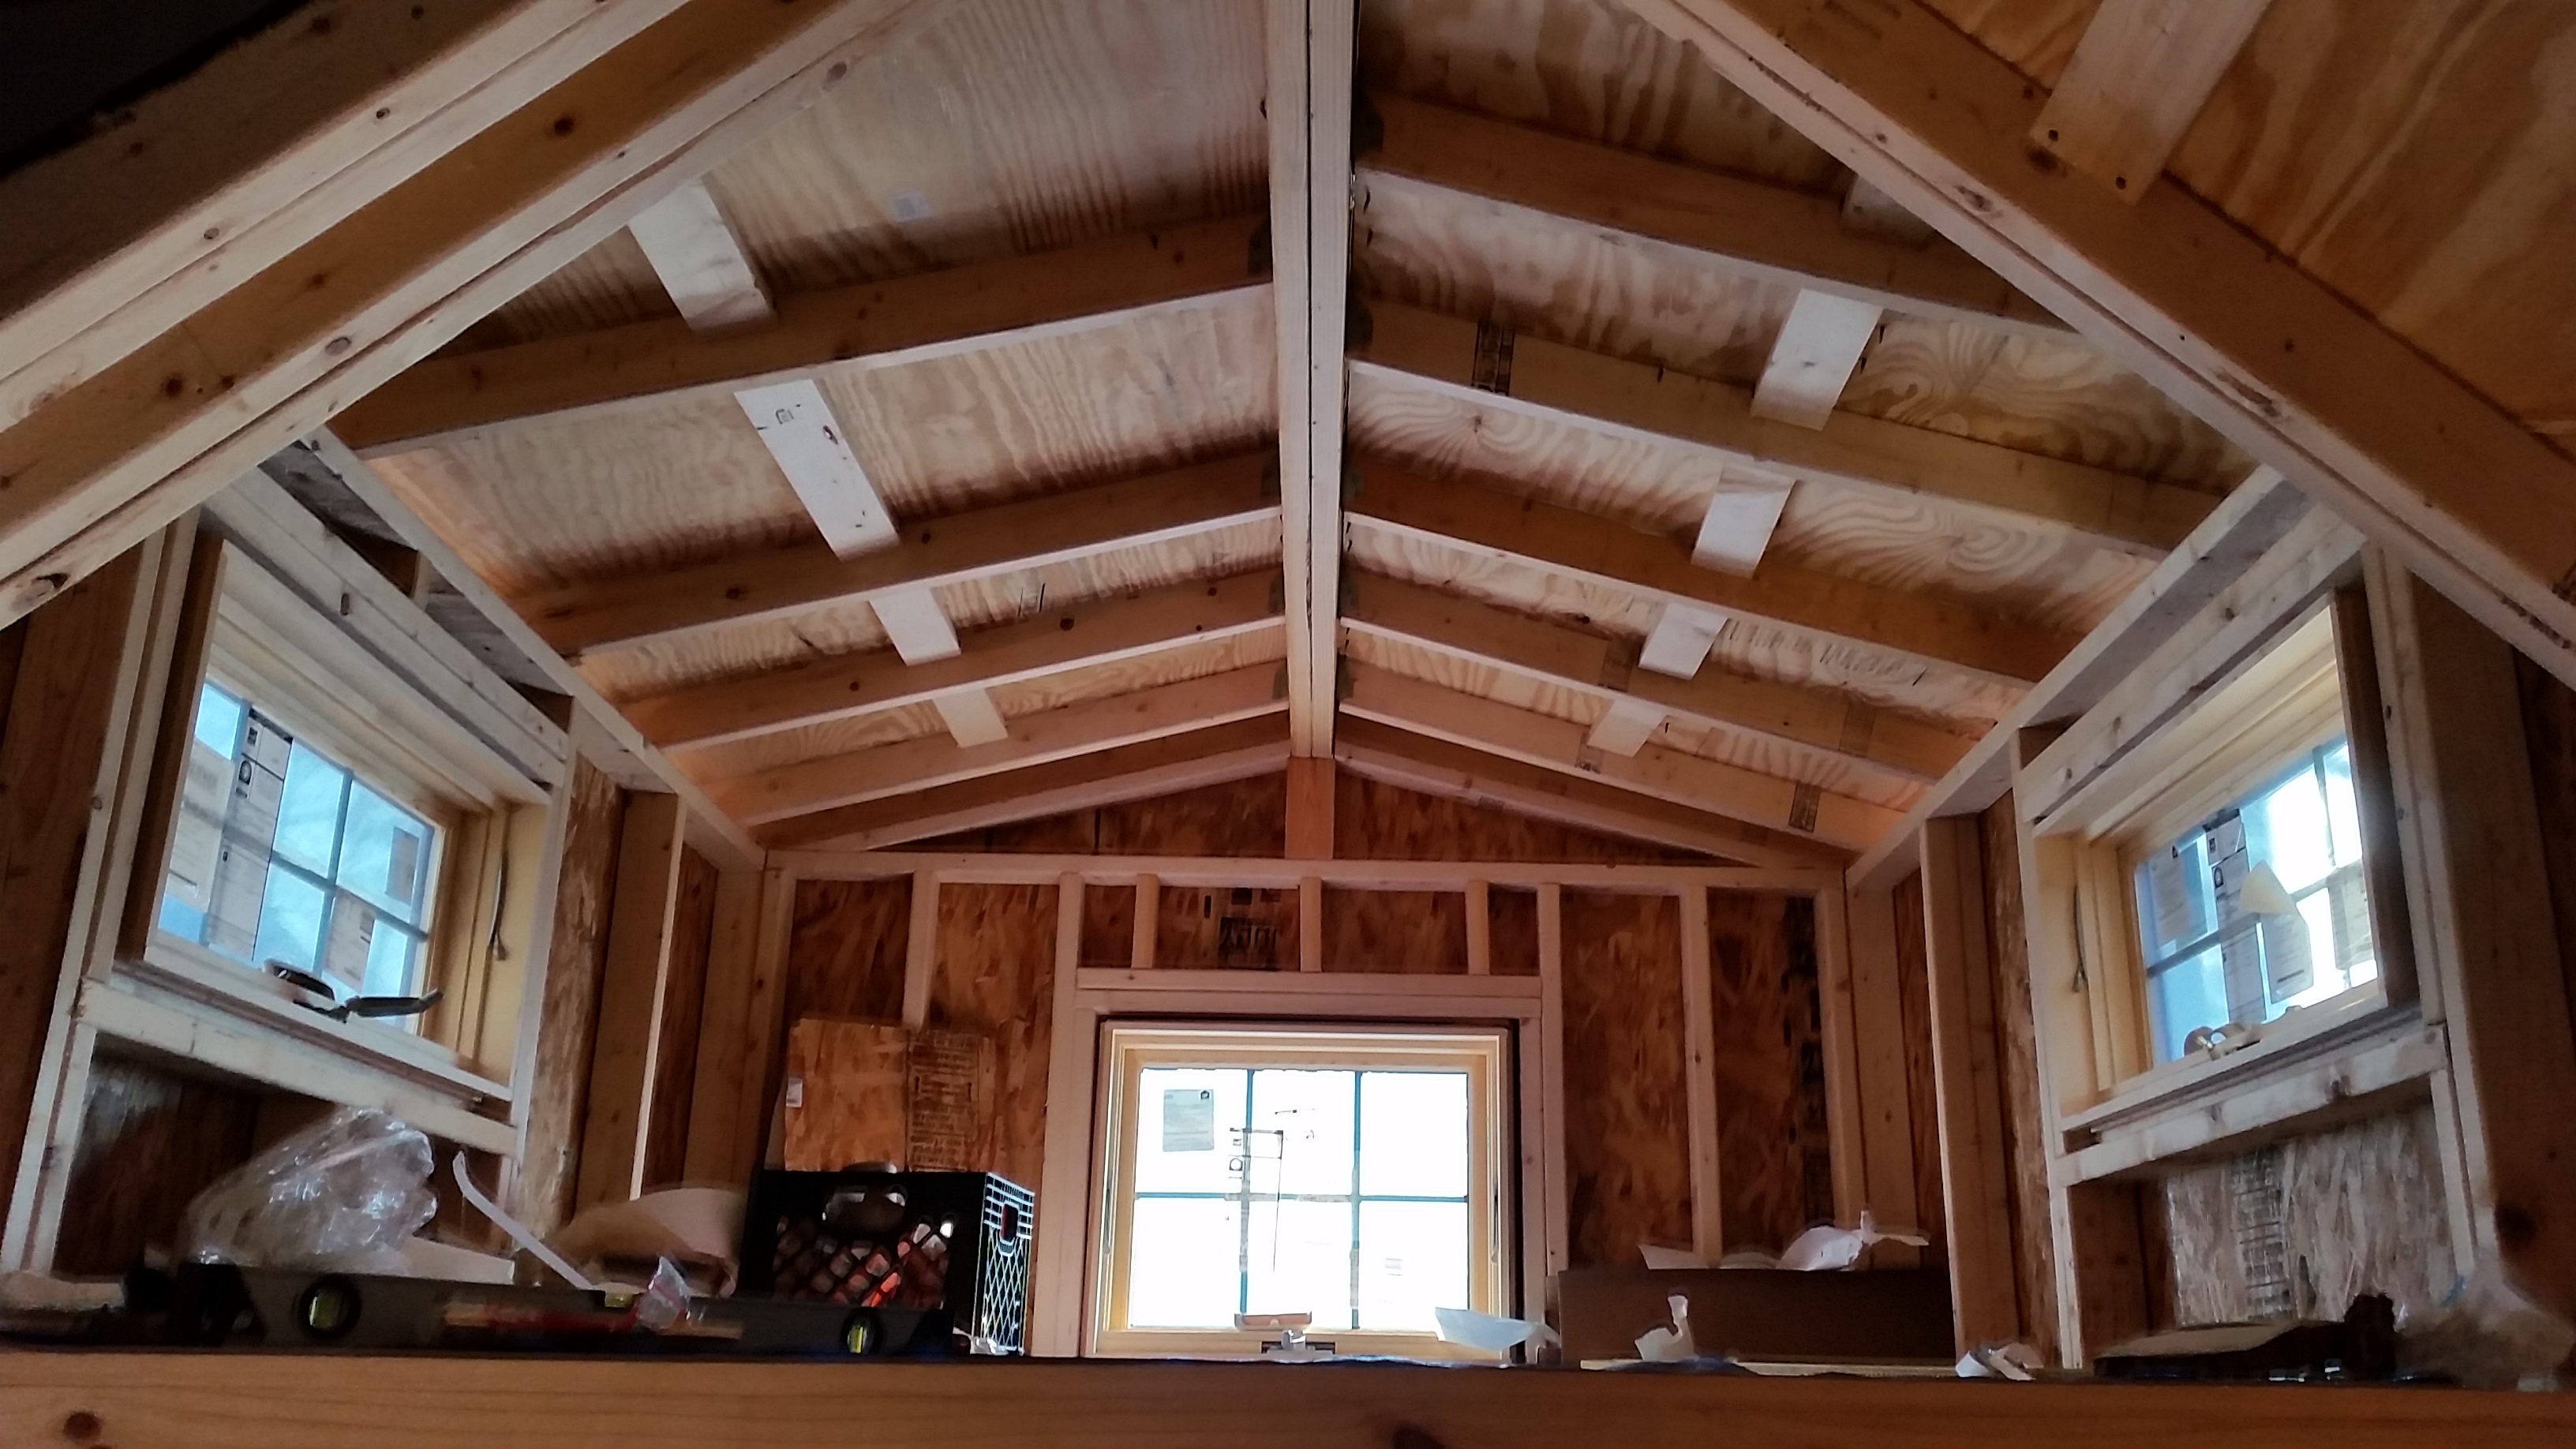 GLORRRRIOUUUUUSSS!
Tomorrow I will be putting in more work on the roof/trim in preparation for the final steps (window/edge trim, furring strips, siding). I am also doing my best to try to figure out how to get R max rigid insulation shipped to me, as they don’t carry it here in warmer climates. But c’mon. I have a house on wheels! I need to insulate for all seasons! So, cross your fingers for me, and I’ll be back soon with more pictures and advice. If you have questions, feel free to ask!
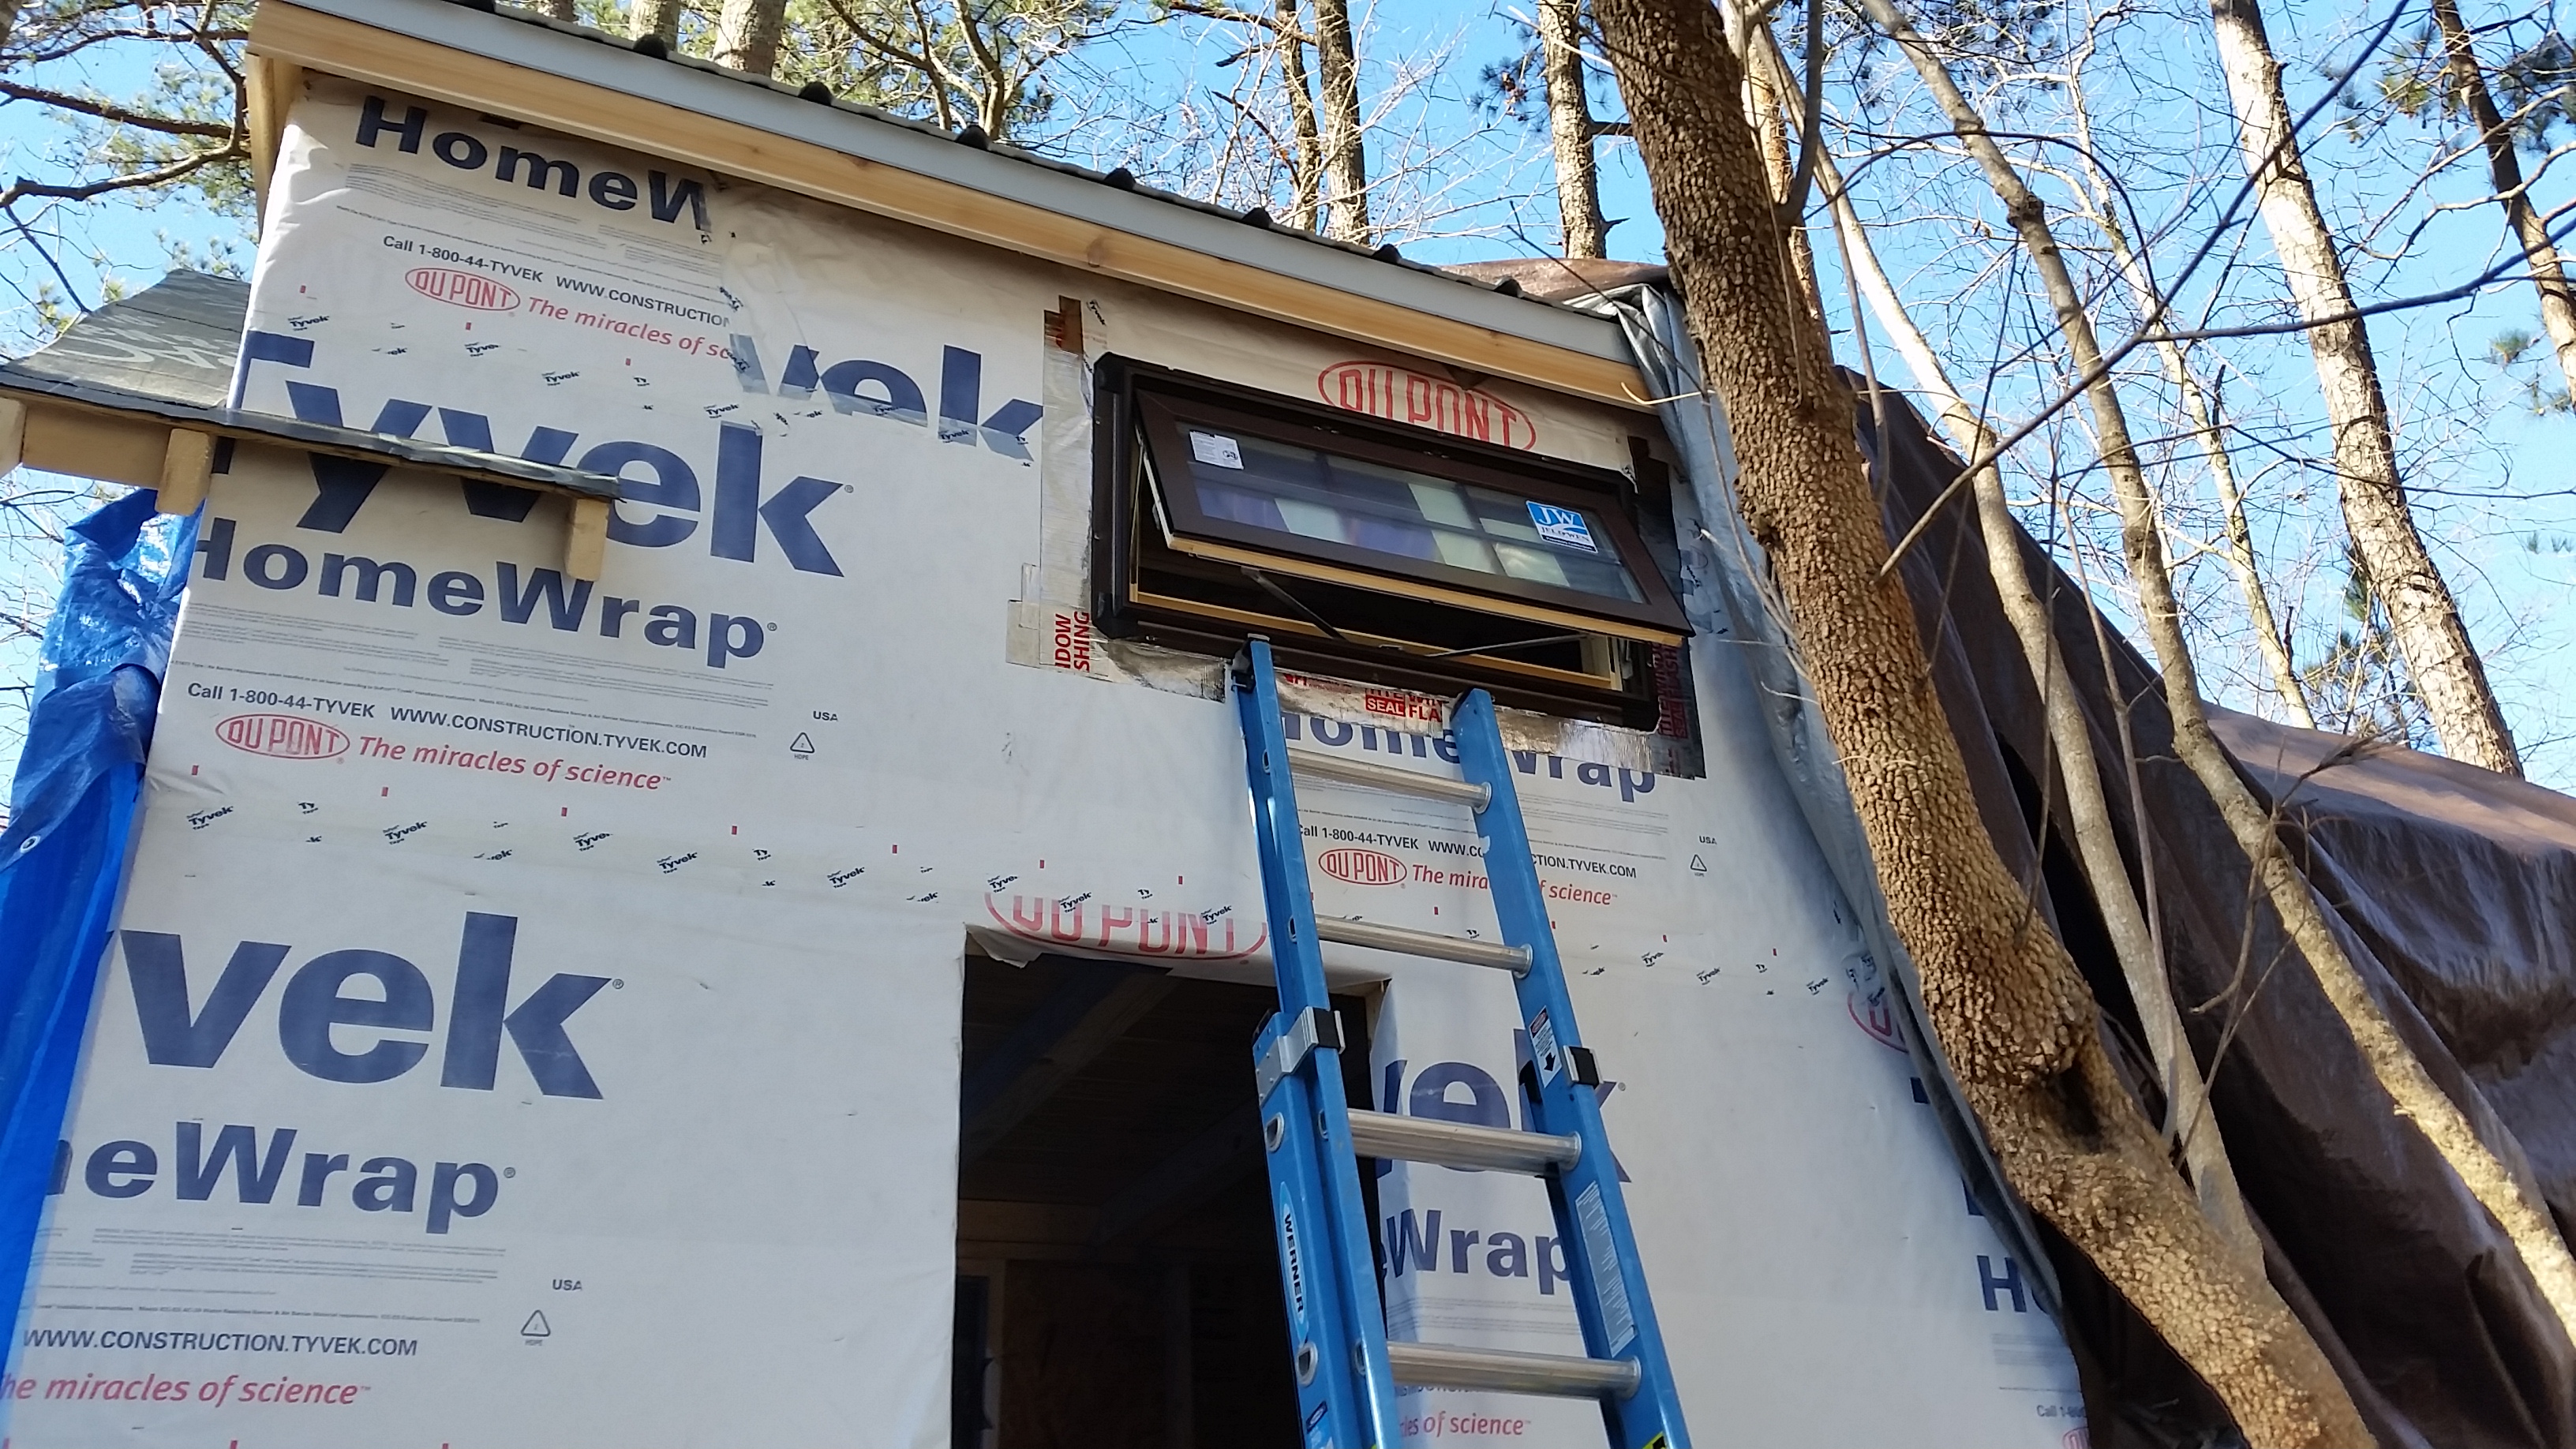 <–I’ll leave you with this picture of a functioning window and the beauty of the eaves trim – cedar looks even better with that silver drip edge, huh? 😀
Back soon! Tiny house on!
Julie
The Roof! The Roof! (It is not on fiiireeee…)

Oh, it’s been so long. SO LONG SINCE I’VE POSTED. I’m sorry. School started up again, and while I love this project, I’ve gotta get them grades. So…let that serve as my excuse/apology/whatever, and let’s move into how difficult it is to build a roof with sub-par blueprints and a lack of basic math skills!
When you last saw me, I was cursing at rafters. That hasn’t changed much, though I’m almost done with that. Hip rafters and jack rafters, folks. Do you know what those are? Well, I’ll tell you. They are otherworldly beasts created to make you cry, hit your head, and throw 2x4s. In short, if you’re going to build a pitched porch roof over your small loft, I’d advise against it. Spring for the extra window, stick with a gabled roof, and save tons of time while keeping tons of space. That’s really the most important advice I can share with you at this time. The pitched porch area is a ridiculous design flaw that does little more than incite hatred in a first time builder while limiting storage space. (Helpful) rant over.
Ok. So, now that THAT’S out of the way…I accidentally figured out hip and jack rafters. So, the roof is ALMOST done! Oh joy! I need to let you know another reason behind the delay, though. I edited the “blueprints.” (They no longer offer any measurements, so the quotes are necessary). Since I went with the dormers on the back loft (more space, more light, better headroom) the roof pitch changes drastically from the dormer area into the roof over the main living space. When I say “drastically,” I mean that the roof pitch literally cuts the dorm entry space down to essentially nothing. You can enter it from the middle on a ladder, but that’s it. Since my master plan was to build some stairs that doubled as storage space, this just didn’t work. Then I realized:
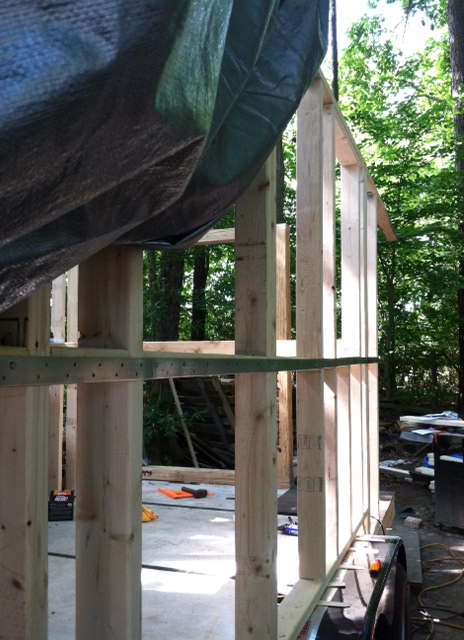
I need taller walls.
 <– Notice that extra foot of wall there. That was my plan, and it worked! (It delayed everything by weeks. But IT WORKED!)
So, with this lovely addition, my roof pitch shifted from this:

To this!
 <– ooh! Ahh! And notice that little crossbeam on the right? Near the top? That’s the frame for the skylight. AHHHHHHHHH.
So, the rafters were pulled down. They were re-cut. And NOW…I have more wall space (ideal when you consider that storage is at a premium and shelving is awesome) AND my roof is a bit less dramatic. Also, a skylight will actually angle DOWN, and I probably have enough new width to put in a small ceiling fan. All of this AND I can make my storage stairs? Worth the effort. Definitely.
So…how to do rafters? My suggestion is this: prepare to be frustrated. Get some good rafter ties at Home Depot. Also get a speed square, and a little angle slider thing. I don’t know the technical name for the angle slider, but it’s a handle with a metal bar at one end that can be loosened and held against an angle. This way, if you accidentally cut something right, you can measure that angle to replicate it. Do some googling on birdsmouth cuts as well. You’ll need this. Trust me. Also, there are some arguments as to whether 2x4s or 2x6s are more appropriate for rafters. Well, I’ll weigh in here: 2x4s are cheaper, easier to work with, and seem to be less bowed (have fun picking through them. Seriously, it’s a challenge in itself). Also, we are talking about a TINY house. The standard spacing is set to 16 inches between rafters, and let me tell you…I can JUMP on the ridge beam and those rafters don’t budge. I think I’m good, unless a big group of kodiaks decides to have a dance party up there. But then I really do have bigger issues than my roof getting wobbly, don’t I?
So, on to the build. After the majority of the rafters were up (pitched front roof frustration: see “hip and jack rafters”) the plywood went on. I opted for plywood on the roof, and went with 15/32 thickness. I got a premium plywood, which means it’s not only sanded (splinterless! kind of) but it also has more layers. I opted for this over OSB just for rigidity’s sake. Then I covered it with Grace ice and water shield. A bit tougher than roofing felt, but a bit more expensive as well. It self-seals around screws, so I feel a bit better about having this under the metal I’ll eventually put up there.
just challenging my fear of heights, here. NBD.


 <– The view from the top. Ahhh, progress. 😀
One more for good measure (because we all know pictures are better than text):
 <– Those are my feet. Balancing precariously on a wall that I built myself (my first walk out here was terrifying. But I think it’s structurally sound)
Ok. So. now all I have left to do (on the roof) is to finish laying the plywood. I’ve left the edges open (see foot picture) so that I can walk gingerly between the front loft, which is still open, and the back dormer roof. This lets me work on the plywood over the dormer without having to climb a ladder and hoist myself up on the roof. Which makes me feel a bit more secure.
So. What does an almost-finished roof look like, then?
 <–why, it looks like GLORRRRYYY! Or, like a tarp-draped mess. Your choice. But you know which I pick.
I have fall break this week (which is 1 day off in university speak) so I intend to get the roof ready for the metal that I’m ordering. I will also start working on the trim and the windows. Then I can toss that damned tarp, which is a pain. I’m really excited! After the roof and the windows/trim, I can put up siding (which should be nothin’ after the roofing) and then I have a completed shell! WHEEE!
So, since early June, when this thing really started to happen, Ive gone from the below picture to the above, AND I haven’t flunked out of grad school. I’d say I’m not doin’ too shabbily. Thanks for reading…can’t wait to share more! (I won’t wait a month this time. Promise!)
 <–mere months ago. Wow. What an awesome journey!
Julie
Why not??

So, this entry is a bit off-topic, but I feel that it is pertinent nonetheless. (Also, I’m currently working on the roof framing, so it’ll be a few more days until I get a good post up on that section, thanks to the ceaseless rain).
I decided to build this tiny house after much research. I was afraid that I wouldn’t be able to do it…I worried about my ability, my resources, my complete lack of experience in building anything, let alone a house. But after 2 years of “studying” online, I decided that I needed to either let it go or get down to it. Obviously, I got down to it. This is not to say that I haven’t encountered problems along the way, or that certain stages of the build haven’t seemed overwhelmingly daunting. But I’ve done them. And yes, I have had help. But I’m proud to say that, for the most part, I have built this house. Not my brother, not my friends, not my uncle…I have built this house. I am not trying to diminish the fact that I have had help on this house. Who wouldn’t need help? No contractor heads out to build a structure on their own, and why would I? But here’s where the difference becomes irritating:
I am a woman. OH GOD NO, A WOMAN BUILDING? Yes. It’s horrifying. And apparently it is beyond anyone’s comprehension. I decided to write this particular entry after yet another incident at a home improvement store…one of MANY I have encountered since starting this project.
Yesterday, I purchased about 30 rafter ties, a box of heavy-duty specialized screws, and 1 tarp. The casual conversation at the checkout played out as follows:
Cashier: “how’s your day?”
Me: “Good, thanks”
Cashier: “Aww. You doing some painting, then?”
Me: “….Uh…building, actually.”
Relatively benign, until you realize that the cashier focused on the single tarp I was purchasing over the 30 rafter ties. Which ring up as “rafter ties.” Oh, yeah. Those must’ve been for someone else, as I am only capable of painting. I realize that the cashier wasn’t trying to be rude, but instead was programmed to ignore the sawdust covering my clothes, the legitimate building supplies, and the commercial builder’s credit card due to my gender. Yes. Just painting. Probably in pink, too.
This is one of many small (but startling, nonetheless) incidents of this sort that I’ve encountered since I began the build. Those who have seen the house under construction (me on a ladder, sweating and hammering away) either assume I’m helping the landowner build his structure (I correct them) or they believe that he’s building it for me, with minimal help from my end (“you’re doing this yourself? Oh, you have ‘help.’ Ohhhhh. Ok!”) This assumption that I could in no way, shape, or form build this house on my own is truly bothersome. If I were male, I know that these questions wouldn’t arise, and if they did, my confirmation of building a house on my own would be met with admiration rather than confusion. So, here’s the point of this post…
Do you want to do something? Are you, due to your gender, age, ability, finances, etc, not one who would normally be considered able to do that something? Yes? Well then, GET BUSY DOING IT. Seriously. Ask yourself “why not?” If you can come up with an answer that is not related to your own mental blocks, then reconsider. But otherwise, ignore the voice that tells you you’ve never done it before, you’ll screw it up, that’s a guy’s job, you’re not strong enough, you’re not smart enough, etc. Just go do what you want. Seriously, please, do it. And if you get scared (you will) or question yourself (which is unavoidable), remember this: No contractor was born knowing how to build. No photographer was born genetically predisposed to better handle a Canon than you. And very few tiny house builders arrive at the build site with a degree in architecture and inherent knowledge of all that goes into building. Ask for help. Welcome that help. But don’t let that diminish your role in the process. If I can do this, why can’t you? Really…why not?
So, get to building. And when the guy in Home Depot chuckles at you for the hundredth time and asks (yet again) what you’re building today, tell him it’s still a house…but not for your dollies. If he’s anything like the guy at the store I frequent, that’ll shut him up pretty quickly.
(Aside: Again…thank you to ALL who have helped/are helping me in this journey. Who wouldn’t want help? Without you (Dan, Tammy, Yfke, Chris, etc) this house would be much less awesome and much more frustrating than it is now, not to mention much less finished. So please know that I consider you all integral parts of this awesome part of my life, and wouldn’t want to do this without you! You’re all welcome to crash in the tiny house any time…but probably not all at the same time…you know. “Tiny” house and all!)
Really. Go build, you strong-ass person. You can do it. 🙂

Julie
Loft floor! YES!

Ohhhh…I’ve been waiting for this moment! So. Now, the tiny house is really actually starting to look like a house! The loft floor is officially done, after struggling with finding untreated 4x4s (don’t want nasty chemicals & ugly beams showing in the house) and dealing with securing them and adding the pine tongue and groove floor/ceilings. Oh. It’s awesome.
So. As I said, untreated 4x4s are hard to find. For the most part, you can only find them in redwood/fir/expensive wood that will run you 45$ a piece. Um. That is not in my budget. However, I figured that, if I was picky enough with the grade 1 structural pine 4x4s, I could make something beautiful happen for only 13$ a board. And I did! WHEEE! (There’s your tip o’ the day on tiny house economy, btw).
First, we measured and cut the beams to fit, making sure to check that everything was square as we did so. Because…tilty tiny house…no good. Especially when careening down the highway.
 <– Oooooh. Marvel at the beauty! And the economy of “these-weren’t-meant-to-show” grade 1 pine boards!
 <– Ahhhhh. The supports for the large sleeping loft are up!
So, after putting up the beams, we had to cut 2x4s to fit between the spaces along the ends of each. This is hard to explain, and will probably prove quite boring, so I’ll just say – it was annoying. But it’s done. So, on to the flooring!
 <– BOOM! The first board goes up! To avoid the “busy” look of beaded pine, I opted to aim the v-groove on these toward the bottom, in effect creating a relatively calm ceiling. Yes. The ceiling is calm. Go with it.

It evolved slowly. Slowly but surely…
 <– Proof that I did a good job: I did not crash through the structure onto the floor. So. I’d call that a major success.
 <–Still holding me. See? I’m up there.

 <– Initially, Yfke was not quite as confident in the structural integrity of the loft. But it held. Repeat – no one fell through the floor. Or off of the sides. So there.
 <–Pretty awesome, huh? Don’t be bored. It’s cool. Really, it’s super cool.
Ok. Well, the large loft was relatively painless. Literally and figuratively. The small loft above the bay windows that also forms the porch roof was not so cooperative, partially due to the lack of space in which to move, and partially due to the damn parallam beams that make up the front bay window wall (yes, the same beams that crushed my finger. I think they’re out to get me). Turns out that these were slightly off when it came to being square. So our lovely friend Dan helped us beat the beast back with some support beams, which were only removed after the small loft was in. This ensured that it would stay square, and also that I had even less room to move while balancing on a wobbly ladder while wielding power tools:
 <–Stable windowsills served as my balancing point here.
 <–The wobbly ladder makes its internet debut.
But in the end, it was worth it! Here is the tiny house tiny loft:
 <—Snazzy time, people. Tiny dance party, anyone?
So. Why am I so excited about finishing the loft floors? Well, first…they’re awesome and I can stand up high without the fear of falling. Second, and most important, is that I can now begin to frame in the roof! Which is the first part of the last step of finishing the shell of tiny home sweet home! YES! Now, if the weather holds (which it did not do today) I hope to make a TON of progress in this area tomorrow. So there should be another blog entry in the very near future outlining work on the roof. And hopefully, before I (and you) know it, I’ll be posting pictures of my adorable tiny house shell, complete with windows, siding, and roofing. (YES!) The inside will have to take a brief hiatus while I school myself (and others) in my last year of my MA program…but you should know that I’ll be fleeing academia at any chance to get out and add personal flair to what will (surely) be the most awesome tiny house ever. Or at least a contender for the top 10% of most awesome tiny houses.
See you soon!
Julie
Closing in the tiny house :)

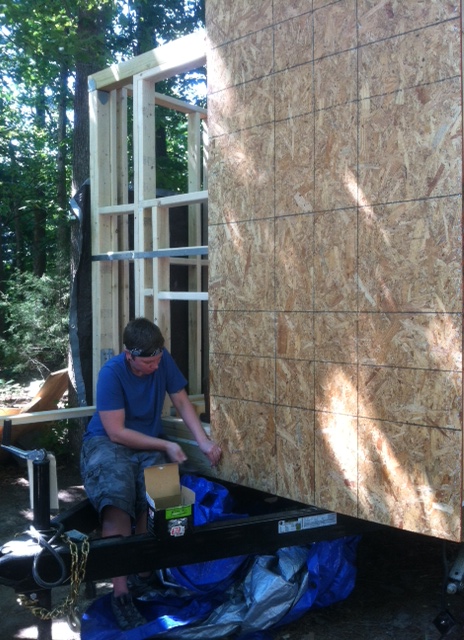
I’m obviously not the best on keeping up with posts, here. So, my apologies for the less-than-regular updates on the progress of the tiny house! I’m working on a very tight time frame – my goal is to get the shell of the house finished (framing, sheathing, siding, windows, roof) done by Aug 15. Why Aug 15? My classes start back then, and I won’t have much time…I’m not looking forward to the days I’ll spend in class daydreaming about what I could be doing with the inside of the tiny house (because obviously, adding personal touches to the inside is probably the coolest part of the whole build!). But I digress. Here is the next installment of my tiny build’s progress…sheathing!
So…the frame was finally (FINALLY!) done, everything is leveled, and now excitement ensues. For the sheathing (plywood or OSB panels) I chose to work with 7/16″ OSB. Why OSB rather than plywood? Well, not only is the price much better (4 x 8 ft OSB panels were 8$, and plywood was about 3 times that price) but due to the makeup of OSB boards, I felt that it might be the better choice for a home that will eventually hurtle down the highway at 70mph. I read a lot on the two choices before going with OSB. Yes, OSB is more prone to expansion if it gets wet. However, Tyvek wrap does much to fix this. Since OSB is made of chips of board glued together (OSB = oriented strand board) as opposed to thin panels glued together, my thought was that IF one of the boards were to crack, it wouldn’t necessarily result in a crack that worked its way down the length of the board. If you disagree, that’s cool. Either way, they’re both good choices. And OSB cuts the overall weight of the structure.
Ok! Enough semi-technical chatter! On with the progress!
So, we moved from fully framed to this stage, and actually got it done over a day and a half!
 <– The first OSB panel! Joy!
 <– It progressed quite quickly. OSB is only about 35lbs per sheet, by the way. So…awkward to handle, but not overwhelmingly heavy.
 <– My lovely colleague Chris, working his booty off (thank you, Chris!)
So, the most frustrating part of this process, by far, was cutting the OSB to fit around the wheel wells. In an attempt to cut down on hair-pulling/screaming/giving up, I bought 2 large pieces of poster paper at Target, and traced around the wheel well before I cut. This gave me a (relatively accurate) template, and though I had to tweak the results (thank god for reciprocating saws) the results are pretty spectacular, in my opinion!

 <– Ooooh. Purty!
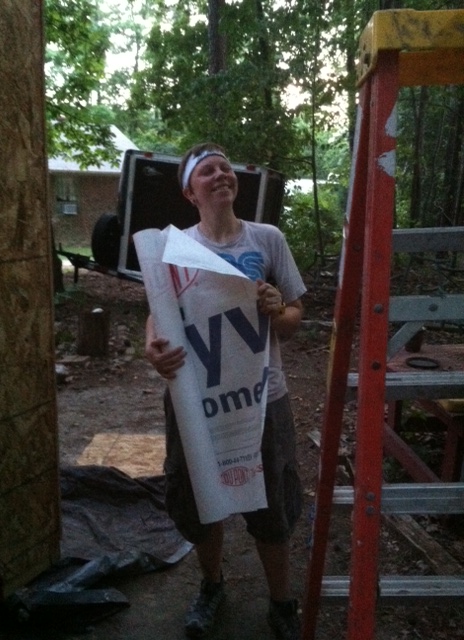
So…once the windows were cut out and the sheathing was finished, it was time to protect the tiny dwelling with Tyvek home wrap. I opted to save money by purchasing the 3′ roll, which was under half of the cost of a typical roll. Not only was it cheaper, but it allowed me to wrap the house with a manageable size of wrap, rather than struggling to control a 9′ high roll of tyvek. To attach, we used staples and tyvek tape along the seams. And then, we were done!

So…the next installment of this fascinating blog will be up soon, as we have moved along to building/finishing the loft sections. I can’t wait to show you the progress on this, and I’m also excited that I can now stand on the top of my tiny structure (the framing held! IT HELD!!!)
See you soon, tiny housers!
Julie
Finishing the framing, preparing for armageddon (a.k.a, sheathing)

Hello all! It’s been a while. I know…I’ve left you bored and alone, brooding and staring at your screen, just hoping more posts would appear in a timely fashion. I failed you, yes. But here I am! Back!
(But first, a shout-out to some of those who have helped me recently! Thank you Sal, Art, and Luis at the Strickland Home Depot. You guys are awesome and you don’t make fun of my project. Nor do you treat me like an idiot just because I’m a woman in a construction store. Thank you to Matt and Brian at 84 Lumber, who are pretty much just kick ass. And thank you to Yfke (tiny house partner in crime) Alicia (sander extraordinaire) Chris (king of sheathing) and of course, the magical Dan, who has made this all possible!)
So, I need to catch you up on the progress of the tiny house. Due to the vague plans, the last few weeks has been fueled by google searches, calls to lumber stores, etc. I’ve gotten all of the info I needed from every source outside of the plans…and this work has kind of prevented me from having extra time to fill you in on the tiny house goings-on. But now…for your viewing pleasure: The tiny house blog continues!
So. When we last spoke, I was finishing up the framing, as seen below. The giantly thick rectangle in the front was the toughest wall – it holds the huge bay window and provides the only support for the door end of the house. So, per the plans, I went out of my way to hunt down parallam beams. What are these mysterious “parallams,” you might ask? Well, I had to google it. They are insanely heavy, very pricy, engineered wood boards created to withhold weights that no tiny house could ever really produce. And since I like safety and am a fan of overkill, I went with them. Fun fact – the vertical beams, before being cut, comprised the huge log of death that crushed my finger. I took great pleasure in cutting them into submission.


We also built a porch. Which will likely be redone, as we found that the composite porch crap is quite flexible. And by “flexible,” I mean that I hold my breath each time I step on the damn thing, hoping I don’t snap through the “boards.” I am NOT that heavy, folks. Pro tip: go with treated wood and spend the extra minutes staining it.
 <– holy crap! A porch! And a Yfke!
So. Once the beastly posts were tamed, the lower-level frame was finished. From here, I needed to add the reinforcing – the CS14 strapping around the frame, as well as the hurricane ties, which secure the frame to the trailer via the incorporated bolts. (if you look in the bottom corners of that frame in the first picture, you’ll notice a metal thingee in each bottom corner. These are the hurricane ties.)
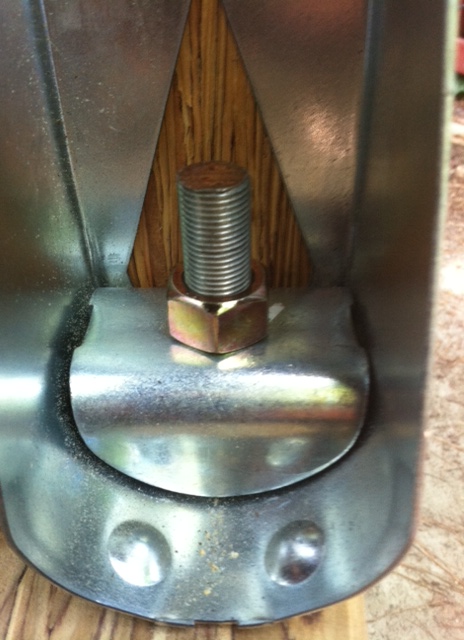
Here’s a close up of the tie. PS…if you are building a tiny house and reach this point in work…here’s a helpful tip – if the nut you purchase doesn’t fit the bolt, the bolt is likely a “Special” bolt. This means it is not only stronger, but it is annoying, as you can’t find a proper bolt outside of a specialty store. You’ll likely need an #18 5/8 nut, as opposed to the standard #11 5/8 nut which is readily available everywhere. I found my #18 nuts at Fastenal. Just google “fastener stores,” and you’ll likely find someone who can help. Because the associates at big box stores will just stare at you and say “uhhh…I dunno. are you sure you’re putting it on right? these work.” No, sir. No they do not. Anyway…here’s another picture of the hurricane tie. Because I have another picture, that’s why.
 <–hurricane tie, before i found the correct hardware. Pretty hardcore, huh?
Ok. So, after I tightened all of the hurricane ties down with the special order nuts, I put the CS14 strapping around 3 of the wall frames, per the plans. This was not all that hard, but when the box says “wear protective eye gear and gloves when handling,” don’t ignore that. This strapping is no joke. I know this, because when it was finally cut, it snapped back and simultaneously cut and cauterised a wound on my leg. I’ll wear it as a badge of home-building pride, along with all of the other dings, breaks, bruises, and aches.
 <–the metal strap. This runs around 3 of the 4 sides of the trailer, and is nailed in every other space. The purpose of this is to not only reinforce the walls’ connection to each other, but to make sure that, if this house tips off the trailer while flying down the highway, it sure as hell all goes together. No wall left behind, people!
 <– somewhat artistic image of me, nailing this strap to the back wall. 🙂
So…what with the title of this article, then? Why no mention of this “Armageddon?” Well, it’s a reference to the next step, which is both daunting and exciting – sheathing! Or, for those of you who use non-construction based vocabularies (and didn’t google it, like I did), it’s time to put up the boards around the framing that form the actual house. YAY! Yay, but also ouch…because…it’s a lot of work. Since this blog is not in real-time, I will admit that we’re almost done with it, because I’m on a very tight time frame (frame! haha! get it! ok, enough.) when it comes to closing in the house. I have until Aug 15, which is when my grad classes resume, and then I’ll have barely enough time to eat and shower, let alone build a house. It’s getting close!
Stay tuned for the next riveting episode, which will be up in the next day or two – in which these questions may (or may not) be answered!:
Did Julie sheet the house correctly? Did she get help, and if so, from whom? Were any bones broken? Does the house look sexy now? What happens to a hand when you do all of the nailing manually, and does ibuprofen truly work on construction-induced pains? AND MORE!
See you soon, tiny house fans!
Julie
Days 9, 10, and 11 – Framing!
So…I decided it’d probably be best to conflate these days into one post, as they all deal with the same thing: the framing of our tiny house walls! YESS! So…it’s finally starting to take shape, which pleases me to no end. We got the annoying sill plate fiasco taken care of, so now all of the plates line up exactly with the subfloor, which will allow us to attach the sheathing past the subfloor to the fascia. This is relatively important, considering that I don’t want the edges of my plywood floor just dangling out into space when I’m driving my li’l home down the highway.
So, as you’ll see in the plethora of pictures below, we’ve completed 3 walls, but cannot raise the right wall until we get the bay (front) wall done. We would have finished this already, but we ran into yet another discrepancy with the Tumbleweed plans. Apparently, this sill plate is to be made with a 5 1/2 x 3 1/4 parallam plate (engineered wood) rather than the 2×4 indicated on the trailer spec sheet. The discrepancies are driving me nuts and costing me cash I can’t really afford…I’d advise shopping around for plans when you get to that point in your tiny house decision – Tumbleweed has the experience, but if you purchase those plans, I’d highly advise viewing the specs as suggestions rather than the rule. In other words…do your own measuring before cutting! (Just trying to save you some trouble! And moolah 🙂
So…enough of that…here’s the first wall…(!!!!!)

And the next day, we finished the second (tongue end) wall. This wall called for a 4×4 top beam, so we had to incorporate Simpson ties to secure the studs to the giant board. When we finished, it felt very stable, but do note that the addition of these ties does add about 1/3 inch height to the back wall. We plan to smooth out this relatively small difference by editing the loft floor by just a tiny bit in the back rather than planing down the treated 4×4 (never sand a treated board! new knowledge imparted to me, and now passed along to you!)
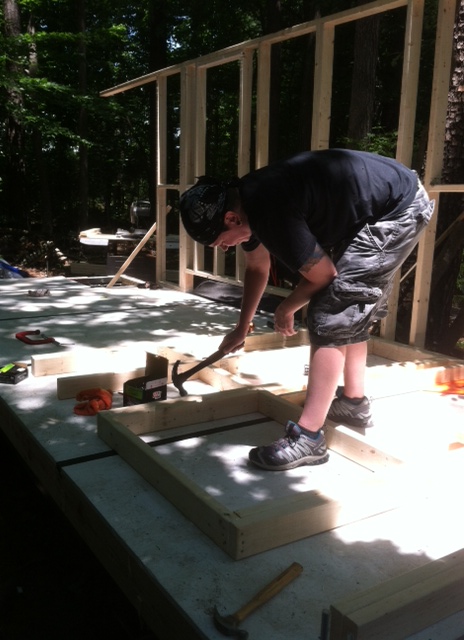 <- Working on the back wall framing 🙂 And yes. I’m still forgoing a nail gun for a hammer. Have I explained this choice before? Probably. (I’m trying to get buff, people. That, and ring-shank nails shot incorrectly into framing by a first-time nail gun user do NOT come out…leading to a redo of the whole piece of framing. No fun.)
So…the back wall was considerably smaller than the left wall, and was done quickly. After letting the liquid nails cure overnight, we raised the second wall:
 <- it has a shape!!
And that shape is beautiful 🙂 Due to the inevitable bowing of framing wood, we did have a bit of a gap where the two edges met at the top, but thank God..Dan came to save the day! Some strategically placed screws closed the gap enough to secure it with nails.
 <-Sam, watching in awe as Dan performs his magic. 🙂
So…here we are…2 walls up!
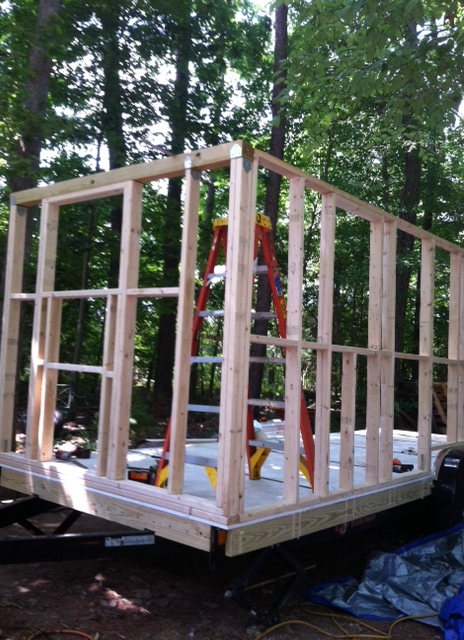
We finished framing the third wall, and finally got the large parallam beams (for the top and bottom of the bay wall frame) and the parallam posts (for the sides of the same) in. However, when unloading a 14 foot long 5 1/2 x 5 1/2 square post, I experienced my first semi-serious accident, which will only slow me down for a bit:
 <- Suggestion: Don’t crush your finger between a metal wheel well and a 150+ lb beam. It will break your tiny finger bone and give your flesh the beautiful hue of an eggplant.
So. I broke a bone. HEY. It was bound to happen! I’m building a house, and it’s definitely worth the small injury when considering what I’ll have in the end 🙂 I’m going to rest my wee finger until Thurs or Friday, then I’m going to wrap that thing in a giant ace bandage and go back to work. Next weekend I plan to finish the frame!!
(Hidden benefit of breaking your middle finger: being able to openly flip the bird to anyone you choose without repercussions 😉
See you soon!
Julie
Day 8

Well hello, tiny house fans! This is an exciting post for me, as it covers the framing of my first wall! So. Here’s what happened:
We first cut out tons of lengths per the blueprints. Upon laying these out as dictated by the plans, we realized that the plans were not made to fit the Tumbleweed trailer, despite being made for the Tumbleweed trailer (thanks for the heads-up, Tumbleweed). Upon realizing that we were following mere suggestions rather than accurate framing lengths, we then re-cut wood that ran parallel to the subfloor and all vertical studs above the wheel well. We fit these together like wonderfully heavy puzzle pieces and started the process of gluing (Liquid Nails low VOC glue) and nailing (ring-shanked galvanized nails, 8D, size 2 1/2″). This went relatively well, though – word to the wise – ring-shanked nails do not take kindly to being removed from wood. So…hammer carefully.
 <- Sam and I, hammering carefully.
In the course of assembling this tiny first wall, I also learned to toe-nail. Not…the things on your feet, people. As I recently learned, a toe-nail is hammering in a nail at a 60 degree angle to secure a piece of the frame to add strength, and also to secure a piece of frame that has no other way to be secured. Turns out I’m pretty good at it, except for the 1 time I smashed my pinky. War wounds. It’s cool. Also, some of the areas were hard to reach due to the wheel wells, but thanks to Sam’s super strong legs, we got that issue taken care of:
 <- Sam, the super-strong!
So, after hammering carefully (yes, we used an actual hammer rather than a nail gun. Why? Because I’ve never used a nail gun before, and if you screw up a piece of the frame, you have to replace the frame. If you use the gun on the sheathing and mess up a few times, you’re still good to go!) and gluing intensely, we ended up with our first frame! We had to let this cure overnight, as the glue takes about 24 hours to set well. So we left the frame out until this morning…
 <- Ahhh! It looks like something is happening!
Having just completed an exhausting (and exhilarating, and death-defying…really, not kidding there…death-defying) day, I’ll leave Day 9’s post for tomorrow. But you should come by and check that one out. Because a lot happened very quickly, some of which might have included a call to a 24 hour nurse line. But I could be fibbing. You’ll have to wait to check that out. 😉
Julie
Day 7
So. The subfloor is done, and now it’s time for the first steps of framing out the tiny house. Can I tell you how excited I am to be this close to framing! CAN I TELL YOU?! Ok. You get it. No more screaming necessary.
Day 7 was a short day. But we got quite a bit done. Though…things did go awry. So, first, we measured out the sill lengths and tried our best to match them with the bolts on the edges of the trailer. The sill plates are essentially just the bottom of the frame…why they need a fancy name is beyond me, but I’m no carpenter (yet). The bolts on the trailer, by the way, hold the whole tiny house to the trailer. That is ALL that holds the tiny house to the trailer. 8 giant bolts, paired with 8 giant hurricane ties (which you should be prepared to special order, as no one carries them. try connectors.com – we got a great price there!) Anyway. We got confused, as the pictures on the plans showed the sill plates hanging over the outside of the trailer, and essentially called for the bolt holes in each 2×4 to be centered. Following directions, because of course the architects know best:
 Following directions and the blueprint images resulted in this wonky affair.
At first, I thought – sure. I just followed all of the directions. And these are centered. Yet there is an overhang. But what do I know? And later, in bed (where all strokes of genius hit, moments before the snooze arrives) I thought – hey. How the hell am I supposed to eventually nail sheathing from the frame down to the fascia if there is a massive overhang?
So…long blog short…we got this done:

felt a massive sense of accomplishment, and then realized that we needed to redo the whole thing. It’s ok. It’s part of the process. (that’s what I’m supposed to say, right?) Anyway, needless to say, cussing commenced and we got back to work. But you know what? It was all so great anyway. I mean…it’s quite the accomplishment to mess up this badly in only 4 hours and then realize the mistake before it’s too late! So…Day 8 will be exciting. (How do I know? Well…because there is a lag in this blog due to drill-induced wrist pains and exhaustion, so I just got home from Day 8 a few hours ago! AND IT WAS AMAZING…stay tuned!)
Julie

Recent Comments